Tuesday, January 31, 2023

HOMEMADE ITALIAN SOUP...MY WAY!


It's been a while since I last posted a recipe. Over two years at least. A lot has happened in the meantime. My daughter moved back home for a new job. I have had several surgeries. I joined a women's discipleship group. I am still trying to clean out and update my home. To say the least, I have been busy. Yet I seem to find time to make soup almost out of nothing. I had everything I needed in my refrigerator and pantry. I made it in my Instant pot and in no time had an extremely flavorful bowl of hot yummy soup waiting for me to dive into. What makes the soup so good on a super cold winter's day? Is it the meld of flavors or the smell of its cooking that arouses our senses and tastebuds? Maybe both, but anyway it sure tastes divine and hits the spot! 

My daughter had fixed a fabulous lunch of ravioli in a tantalizing sauce with portabella mushrooms and chunks of chicken sausage. She then tells me since she fixed lunch, dinner was my job. What to fix? She said she wanted Italian soup. Ok, I can do that. 

Below are the ingredients that I had on hand.

Butter, Carrots, Onion, Celery, Red Wine, Better Than Bullion Italian Herbs Seasoning, Chicken Bone Broth, 5 Chicken Tenders, Collard Greens, Yukon Gold Potatoes, Tuttorosso Italian Inspirations Diced Tomatoes, Dried Multi-colored Cheese Tortellini, Tastefully Simple (TS) Onion Onion, TS Garlic Garlic, and TS Seasoned Salt. 


I peeled and cut up, diced, and placed in an instant pot set on saute, high.  1/4 Cup Unsalted Butter melted.  3 carrots Peeled and cut into coins.  3 large stalks of celery cut into 1/2 inch pieces.  1/2 yellow onion diced.  2 small Yukon Gold Potatoes diced.  1 heaping Tablespoon of Better than Bullion Italian Herb Seasoning.                                                                                                                                     

Saute till onions are translucent then add the following to your instant pot.   Splash of Red Wine to deglaze the bottom of the pot.  5 Chicken tenders diced into one-inch cubes.  One quart of Chicken Bone Broth. Six leaves of destemmed Collard Greens are placed on top of each other, rolled into a tube, thinly sliced then cut the tube in half down the center.  Put the lid on and lock it in place.  Hit cancel then hit pressure cook on high for 20 minutes. Quick release of pressure.


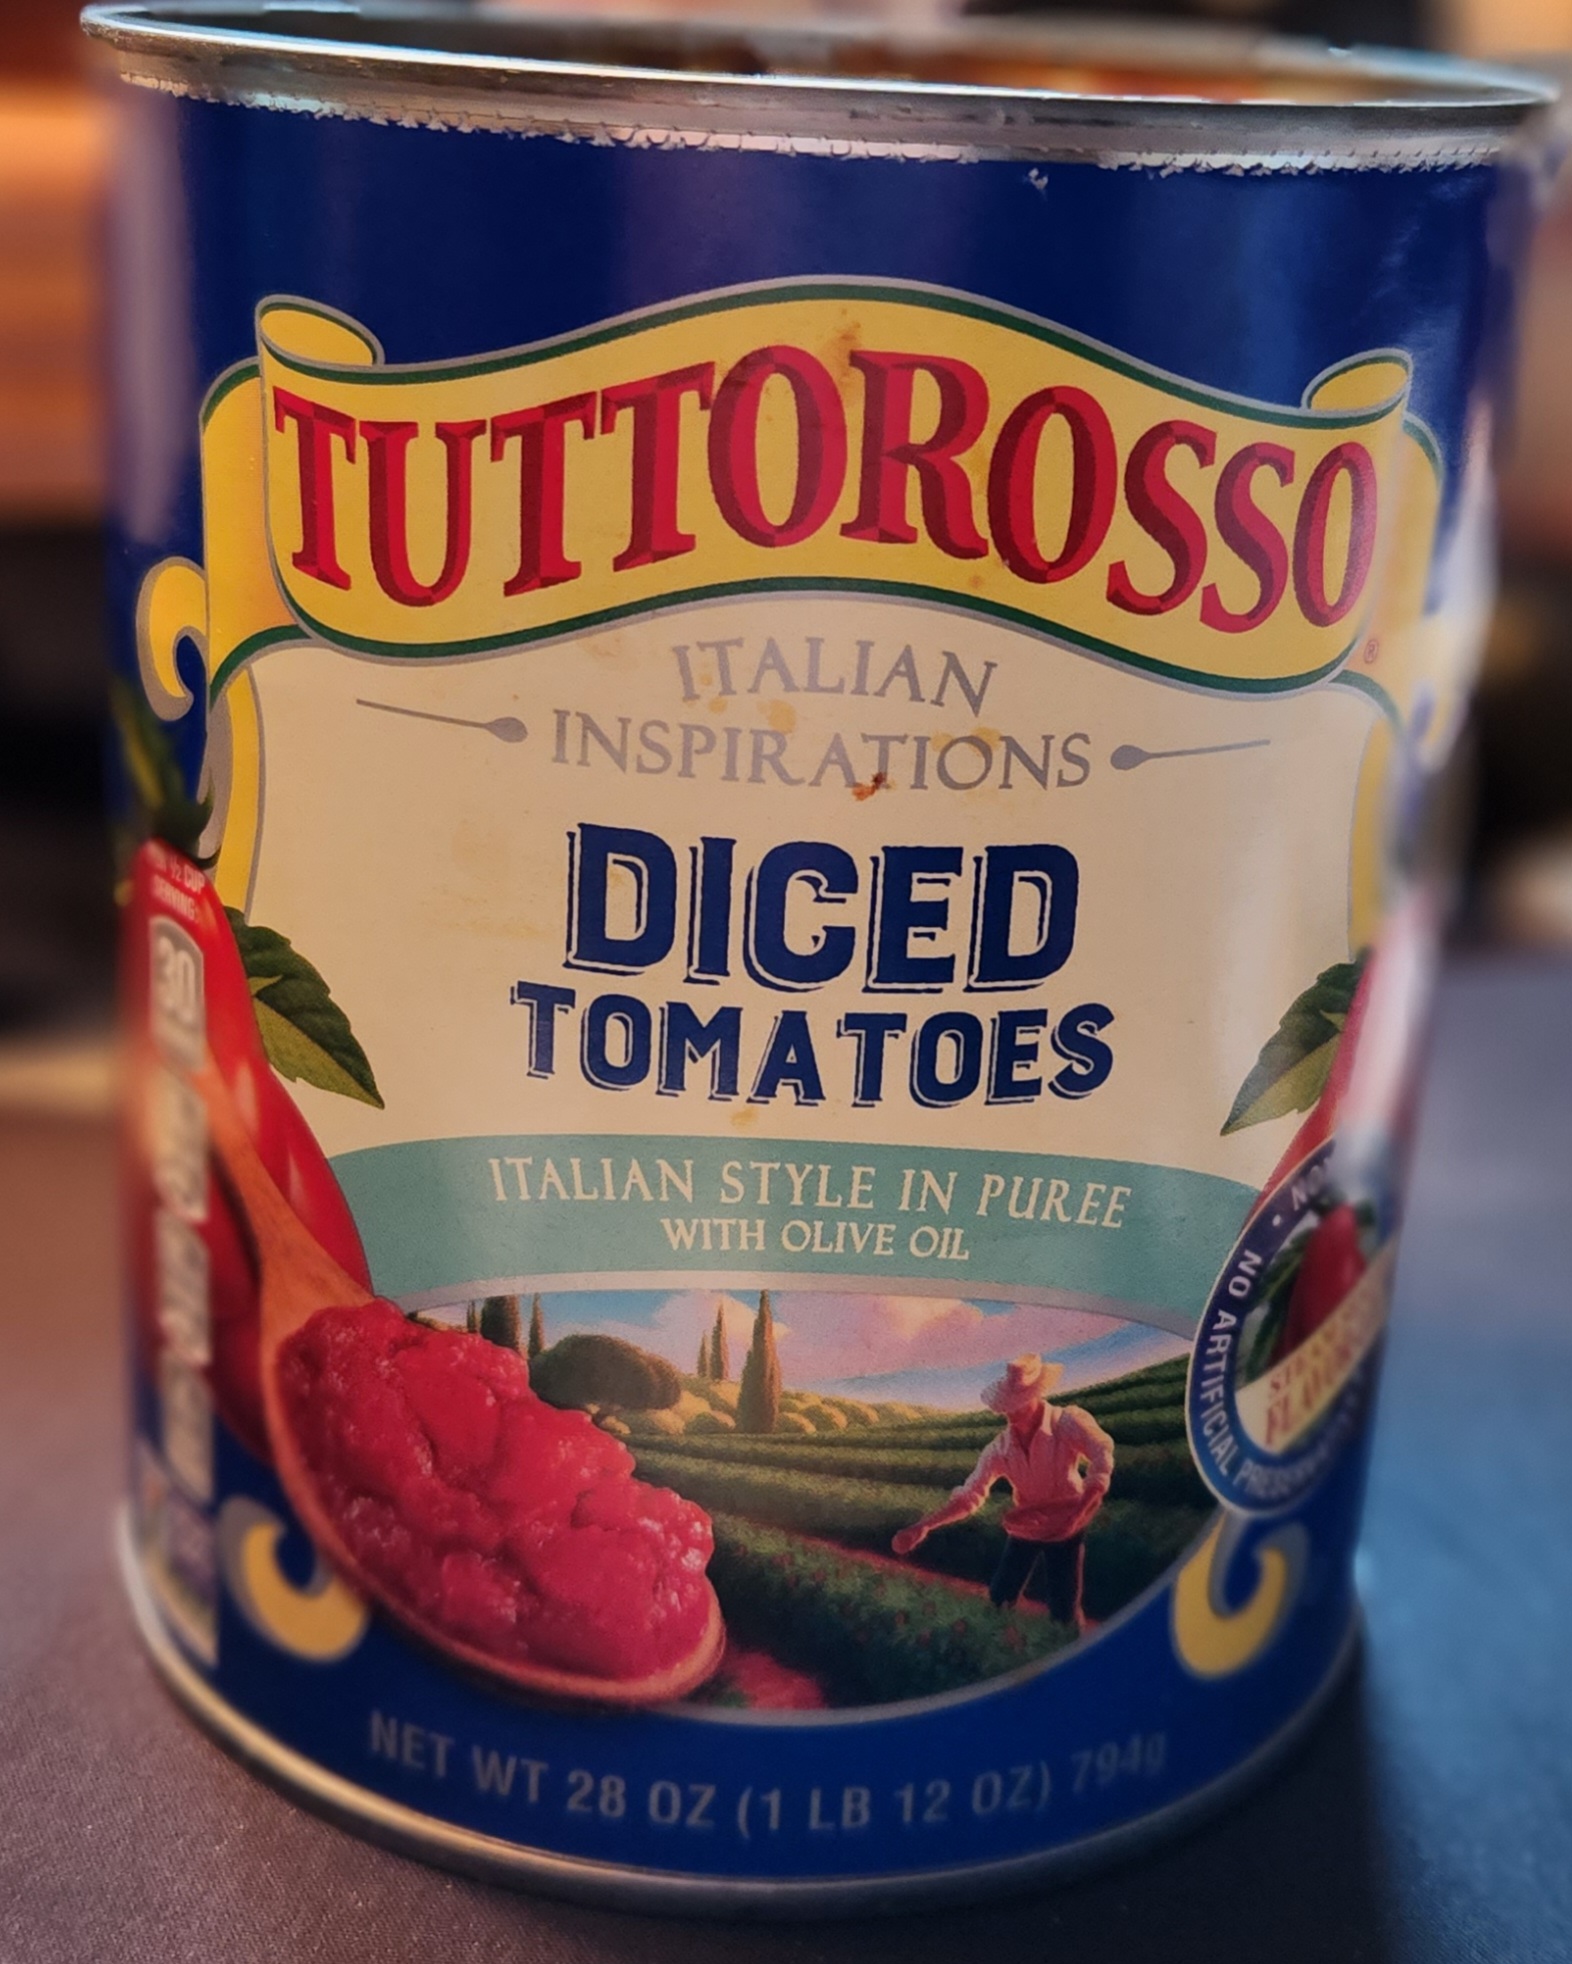
Then add in: 1-28 oz Can of Tuttorosso Diced Tomatoes, which I purchased at Crest Grocery in Norman, OK     

Cap-lid of TS Onion Onion, Garlic Garlic, and half a cap-lid of TS Seasoned Salt. Which I sell.                                                                                                 3/4 Cup of Dried Tortellini that I purchased in the Bulk section of Winco in Moore, OK.


Stir well, if it looks like it needs more Chicken Bone Broth you can add more at this time. You judge the amount. Put the lid back on the Instant Pot, lock it in place, and press pressure cook for 10 minutes. Quick release when done and serve with a crusty piece of sourdough bread with butter and a salad

I didn't add any extra salt. It wasn't needed.  This soup was so easy to make. Of course, you can use any kind of diced tomatoes you wish. However, if you do have access to the Tuttorosso Diced Tomatoes, I highly suggest you use them. Also, you can add more veggies if you wish.  This makes up a lot of soup if you have a small family. There are two of us and we will be able to have several servings over the next few days. 

Enjoy!


Peace, Love, and Happy Eating!


P.S. Let me know if you fix it and tell me what you thought of it. 


Tuesday, August 24, 2021

Egg Noodles...German Pot Pie or Chicken and Noodles

German Pot Pie Noodles

 Not long ago someone posted a question on Facebook about "What's the first thing that comes to mind when you think of your mom?"  My Sister-in-Law said my mother's German Pot Pie. My daughter had never heard of it, yet she had it at her Grandmother's house when we would visit. I piped in and said I had the recipe and it wasn't hard to make. They begged me to post it. So here goes.

Mom's Homemade Egg Noodles

Ingredients:

1 cup Flour, sifted first to make a cup of sifted flour. 

1 tsp. Baking Powder

1 tsp. salt

1 egg (medium to large, if eggs are are small use two.)


Directions:

Sift together flour, baking powder, and salt into a bowl, make a well in the center. Break the egg into a cup. Save 1/2 of eggshell, fill with water, and pour into a cup with egg, beat well. 

Pour egg mixture into flour well, stir until all flour mixture is damp, bring together into a ball on a floured surface. Sift a bit of flour over the dough ball and knead.  Continue to sift the flour onto the dough and knead(a little at a time) until the dough is hard to work with. Cover with Saran Wrap and let rest for 30 minutes. Roll out onto a floured surface about 1/8th inch thick. Cut into strips or squares. Drop into the center of boiling chicken broth, cook until tender.

German Pot Pie:

Cook chicken until done in a stockpot. I generally put in onions, garlic salt pepper celery, and a bay leaf. Remove chicken to cool then strip the meat from bones, reserving bones to make chicken stock at a later date. Remove onions, garlic, celery, and bay leaf leaving a clear broth. Drop egg noodle squares one at a time into the center boiling broth. This way they won't stick together. Cook till tender add the chicken back into the pot with noodles. Serve with whatever side you wish. You can leave it in the pot or pour it into a deep serving dish. 


Chicken and Noodles:

Cook chicken like above. Pretty much the same recipe except cut noodles into long 1/2 inch wide strips, let sit for about 10 minutes with a bit of flour dredged on them. Drop into the center of broth about 5 at a time until all in. Cook until tender. Leave in the pot or pour into a deep serving bowl. 


Wide Egg Noodles


Tuesday, September 15, 2020

We Need to Learn to Cook Again


It's a sad state of affairs when we as a society have reduced ourselves to purchasing an oven that we can pour water in and pull a pre-prepped meal from the refrigerator, scan a barcode put that meal in the oven and so many minutes later have a meal on the table and call it dinner.  Where is the love? Certainly not from the person that prepped that meal. They don't know you. They don't care.  What has happened to us?  I'll tell you what happened. They took home economics out of school. They took an important life skills class and did away with it. They said it wasn't important anymore. They told us that families had to have a gazillion things for our kids to do so there was no time for moms to slow down enough between school, soccer, football, cheer, and fall baseball to fix a nutritious meal for our families. So they pumped the airwaves with commercials saying eat this, buy that. Subliminally, they said we want to make you unhealthy. Therefore mom's started to rely on hamburger helper,


drive-thru Micky D's, and Papa John's Pizza Delivery plus many more lessening their cooking skills and upping the diabetes factor. Guess what, parents were so busy with all the extracurricular activities they forgot to teach their own children how to cook, one of the major life skills that every child should know. Oh, the child now knows how to speed dial the cell phone and order their meal on mom or dad's credit card. How to boil water, not so much. 

I had Home Ec, now known as Family and Consumer Sciences, from the time I entered 7th grade up until 12th grade. I graduated from High School in 1967. Did I need it? Probably not, as both my mother and grandmother were very proficient in cooking and sewing, but I loved it just the same. I learned something from each teacher I had. I loved cooking. Making fancy yeast dinner rolls. Constructing a pleated skirt. I bought my daughter a sewing machine for her birthday several years ago. I am the one that uses it when I go visit. She has never gotten it out of the box. She is afraid of it. As I told her,  "You are going to have failures in anything you do, not everything is going to be perfect. Get used to it." She is one of these people that if it isn't perfect the first time she won't try it ever again. I don't know where she got that from, certainly not from me. I'm the failure kid. You can't grow if you don't fail. 


Cooking, for example, a chef will try a recipe 100's of times before he might hit upon the right blend of ingredients to make the dish just right.  A recipe can always be improved, we all know that. Nothing is set in stone. I have been watching CHEF'S TABLE on Netflix, different famous chefs from all over the world, and their stories. The chef from Turkey was very interesting. How you have one country and so many different ethnic dishes, yet one sect of people will not eat other sects of people's dishes just because of the different ethnicity. It is so sad because they are really missing out on something really special in the food, to learn about a different culture and a different way of doing things.  The chef was really sad as he discovered the area he grew up had all but lost its food culture. No one knew how to make greasy dumplings, a dish his grandmother used to make. Thankfully he still had one family member who knew how to make the dumplings. He managed to save that part of his culture. It is now in a book. 


I write this because I ask you, what part of your culture are you saving. What has your mom, dad, or grandparent passed down to you food-wise? What memory do you have to pass to your children? We as a society are losing our food culture fairly quickly without realizing it. I am getting ready to purchase an on-line children's food prep course for my grandsons. They are at the age to start learning all about the kitchen and food and start learning how to cook. I started at 8 being able to help my mom prep things in the kitchen. I knew how to bake a cake. I sat at my grandmother's knee and watched her make icing for cakes. I watched my mom make home-made noodles. I did it quite a few times myself before I was 10. So good in chicken and noodles, Sunday dinner with homemade coleslaw with special dressing. There is so much to pass on to our children and grandchildren. The problem is getting their noses out of their electronic games and devices. 


Learn to cook again people. Learn to enjoy making a simple bechamel sauce, a fancy word for a white sauce with three ingredients. Butter, flour, and milk. It was one of the first sauces my mother taught me to make. The foundation of any good Mac and Cheese recipe.  And no, it is not a gravy. Learn to enjoy constructing a dish you can be proud to say you made. If necessary go and take some classes. Have fun with it. Make it a couples thing. Don't just Nuke everything. It's not the same. Watch YouTube videos if necessary. But learn to prepare a special dish and surprise your family. Set the table with the good china and glassware. Teach your children respect for the food they eat and where it comes from, and no it doesn't come from the grocery store it comes from the farm, from the good mother earth. Our children need to know where their food comes from, how it is grown, harvested, prepared, cooked, and served. It just doesn't just magically appear at the grocery store and we purchase it. 


I leave you with this. One day you will wake up and will remember something your mother use to make when you were little and you would like for your kids to taste it. You don't know how to make it, you don't have a recipe for it because you didn't take the time to ask your mom for the recipe and write it down.  Now it is lost because you don't know how to cook. Think about that. A food culture lost because all you know how to do is scan a barcode and turn on a microwave. It's never too late...


Thursday, March 28, 2019

Quick Instant Pot Potato Soup


About a month ago, I was thinking about potato soup and wished I could have a bowl. The thought quickly went out of my head as I had tons of things to do in getting ready to head for Texas to help my daughter with the grandkids during their spring break. Not seeing them since Christmas had been a stretch this grandma couldn't bear any longer. 


After my visit, I was home again and accidentally triggered an allergy cold when I mowed my yard with my new lawnmower. an old fashion push mower.  I was sick, couldn't breathe, runny nose, no taste buds working, headache and facial pressure
The one thing that always made me feel better was pipping hot potato soup. Yet I didn't feel like taking the time to make it when, 💡 moment, I realized I had an Instant Pot. It literally took just a few minutes to chop up my veggies, add water, butter, seasonings, and Osem©️ dry chicken consomme to the mixture and 4 minutes later I had pipping hot soup ready to eat. I was a happy camper for sure. The soup was so wonderful that I had two bowlfuls. I made just enough for three bowls.

So If you want something quick, that is ready to hit the hunger pangs where it hurts, then this is the recipe for you. 

Quick Instant Pot Potato Soup

3 servings

Prep time:  6 minutes 
Cook time: 4 minutes 
Total        10 minutes

Equipment used:


Veggie Chopper and Instant Pot


Spirtal and a good Sharp Knife


Vegetable Cutting Mat


Ingredients: Some special ingredients...


Really, whatever you have on hand will do. I just happened to have these ingredients available. 

3 Tbsp. butter
6 very small red potatoes, chopped into bite-size pieces
1/4 cup yellow onion, chopped
1/4 cup celery, chopped
3 cups water, divided
1 1/2 Tablespoons Tastefully Simple Onion Onion Seasoning
1 1/2 Tablespoons Tastefully Simple Garlic Garlic Seasoning
5 twists of fresh ground black pepper
1 Teaspoon Kosher Salt
1 Tablespoon Osem© Chicken Consomme or your favorite dry chicken bouillon
1/2 cup heavy cream
1 C Milk
1/2 medium Jalapeno, deseeded (optional)(leave some seeds in if you want a nice kick)


Directions:

Plug your Instant Pot in and press Sauté, high heat
Add butter
Wash and chop Potato, add to butter, stir.
Wash and chop Celery, add to butter, stir.
Wash and cut in half the Jalapeno, deseed and mince finely the flesh. Add to butter, stir.
Add 1 Cup Water, stir
Add Osem© Chicken Consomme, stir
Add Tastefully Simple Onion Onion and Garlic Garlic  Seasonings, Stir
Add Salt and Pepper, Stir
Add 2 Cups Water, stir
Put lid of Instant Pot on making sure the quick-release valve is in off position. Hit the cancel button, then press manual for 4 minutes. When done, quick-release the pressure. 
Once all the steam has been released, remove lid and add:
Heavy cream
Milk, stir well. 

If you like your soup to be a bit hotter temperature-wise hit cancel then press sauté button, high heat for a few minutes, stirring well, be sure to not let the soup boil. Once soup reached the desired temperature, turn off and dish up and enjoy. 

Delicious Potato Soup


Note, If you want to make a large pot of Potato soup the old fashion way, then refer to my other recipe...Knock Your Socks Off Potato Soup

Peace, Love and Happy Eating!

Thursday, November 16, 2017

Anytime Stuffing...Not Gluten-Free

When I was little mom would make the Thanksgiving stuffing starting two days before so all the spices would meld together. She would toast white bread and then let it set and dry out then cut it up in cubes. Then she would make cornbread and break it up and let it dry out. 

Mind you, we had two refrigerators so we could make up food in advance for big meals for the holidays. The next day she would haul out the big roaster and put in two sticks of butter to melt and then chop up celery and onions and put it in the roasting pan and cook until onions were opaque. She would add in the chicken broth, canned milk and 2 eggs. I got the wonderful task of getting to stir this up until it was all blended.  When it was mixed up with the right amount of liquid, not too stiff, but not too loose. It was time to start the tasting. 

Mom would start adding in the spices; poultry spice, sage, thyme, rosemary, salt and pepper.   She loved her sage, so we had dressing that had great hints of sage. There were times when if we were on a trip, if she saw wild sage, we would stop and she would pick some to use in next years dressing.  

Over the years we switched to making homemade drop biscuits made from Bisquick to take the place of the toast.  It changed the whole texture of the stuffing for the better.  I got to where I was making the cornbread with Hodgeson Mills Stone ground Yellow Cornmeal instead of more refined cornmeal made in a cast iron pan. The texture of the dressing really changed for the better. 

The recipe has changed over the years some. I now use chicken bone broth instead of just plain chicken broth. If need be, I use liquid Chicken concentrate or Osem Chicken concentrate crystals for extra flavor. 

So with that being said, let's get started.

Ingredients:

Two trays of homemade biscuits made from Bisquick. Broken up and dried out

One pan of cornbread. Broken up and dried out

Two sticks butter or 3/4 cup coconut oil

One bunch of Celery, washed and chopped medium fine

Three large yellow onions, peeled and rough chopped

1 Large can of evaporated milk

1-2 qts. chicken bone broth*, preferably home made or

Osem chicken broth crystals

Poultry Seasoning

Sage  (optional)

Thyme  (optional)

Oregano  (optional)

Himalayan Pink Salt

Pepper


Directions:

In a large roasting pan on top of the stove place butter or coconut oil in pan to melt over medium-high heat.  Add in celery and onions. Cook until onions are opaque. Turn stove off. 

Add in dried biscuits and cornbread. Stir to incorporate the bread mixture with the onions and celery. 

Crack the eggs into a bowl so as to make sure there are no shells before adding into bread and veggie mixture.  

Add in one half can of evaporated milk.

Add in one half of bone broth or chicken stock.

Start stirring with a wooden spoon or spurtle*, 
Spurtle
continue to mix until everything is Incorporated.  If dressing is stiff, add more evaporated milk and chicken bone broth until mixture is fluffy but not super wet. It doesn't hurt to have a second box of bone broth on hand.


Add in 2 Tbsp of Poultry Seasoning, stirring well

Add in 2 Tsp. of Himalayan Pink Salt

Add in a pinch each of Thyme, Sage, Oregano and pepper.

Stir well. Taste.

If you want a more chicken taste add in a Tablespoon of the Osem Chicken Crystals or Liquid Chicken Broth.  The taste from here is entirely up to you. 

Place in a 9 x13 greased baking dish cover with foil and place in a 350 degree oven and bake for 30 minutes. Last 10 minutes of cooking remove foil. 

* Spurtle, is a long narrow wooden blade designed for stirring oatmeal .  It is one of the best kitchen tools I have found for mixing up a variety of items such as dressing, macaroni, potato salad, sauces, stews.  It hails from Scotland and dates back to the 15th century. I got my Spurtle from QVC. 

* Chicken bone broth is more flavorful than regular chicken broth and contains more minerals as well. Homemade broth contains the collagen our bodies needs. Chicken bone broth can be found at Walmart. 


Wednesday, November 15, 2017

Whipped Sweet Potatoes Done Up Right...Smeal Style...

Years ago when I was learning to cook, I would watch my mom start very early the day before Thanksgiving start preparing the food. One of the dishes that was treasured by my dad was whipped sweet potatoes with toasted marshmallows on top. Mom would choose 2 to 3 large sweet potatoes and scrub them and trim the ends off then put them in a large pot of water to boil until tender. Then she would remove from the pot and let cool. After they were cool she would have me remove the skins and cut them up into cubes and put them in a large bowl. Then the magic began. Brown Sugar, Canned milk, butter, vanilla, cinnamon and a hand mixer. She would have me whip them until they were light and fluffy. We would place them in a greased pie plate, cover and put them in the refrigerator until the next day where we would take them out and bake at 350 for 45 minutes then cover the top with miniature marshmallows and toast the mallows until toasty golden and puffed to perfection. It was the only thing my brother would eat of the dish as he was not a fan of sweet potatoes. Over the years the dish has changed very little other than adding in chopped walnuts or in a pinch using Princella Yams in a can. If you want a sweeter sweet potato, bake it until you can insert a knife into it. 

Ingredients:

2-3 large sweet potatoes or a large can of Princella yams.
1 small can of condensed milk
Brown Sugar
5 Tbsp. Butter 
Cinnamon
Dash of Vanilla - About a 1/2 tsp. 
Miniature Marshmallows (Optional)
Walnuts  (Optional)

Directions:

Wash and trim ends of sweet potatoes. Put in a large pot of water and bring to a boil. Turn down and simmer until a knife can be inserted easily. Remove an cool. 

Oven method.  Wash sweet potatoes and place in a 350 degree oven and bake until a knife can be inserted easily. Remove and cool. 

Can method. 2 large cans of Princella yams drained. 


Skin the potatoes and cube, placing cubes into a bowl.

Oven Method, split open the shell and scrape out the pulp into a bowl. 

Add half of the canned milk

Add 3 Tbsp.Butter

Add Brown Sugar to your desired taste of sweetness, we always liked 2 packed handfuls. 

Add 1 tsp. cinnamon

Add Dash of Vanilla Extract

Whip with an electric mixer on high or a stand mixer on high.

Add more condensed milk if potatoes are not light and fluffy. Be sure not to let them get soupy. 

Pour into a greased pie plate. 

Dot top with chopped walnuts, depends on how many you want. We like about 1/2 cup of chopped walnuts. 

Dot with cubed up butter about 2 Tbsp.

Sprinkle with brown sugar, about 3 Tbsp. 

Bake for about 30 minutes in a 350 degree oven. 

Remove from oven top with miniature marshmallows, put back in oven, keep an eye on marshmallows as they toast. When golden remove and serve. 


Tuesday, November 14, 2017

Food Of The Gods...Homemade Tomato Soup...

Not long ago I had 4 Roma tomatoes that were on the verge of going bad. What to do with them other than tossing them in the trash. Lightbulb!!! I recently was watching a Rachel Ray show and she mentioned taking vegetables that were just past and roasting them and then freezing them for later. 

Out came my knife, chopping board, sauce pot, garlic press and Vita-Mix. I Chopped up the tomatoes and put them into the sauce pot with some olive oil, garlic with a touch of salt over low heat. 

Lately I have been cooking with spices that I would normally not cook with such at Tumeric. However Tumeric is a natural antinflamitory and with the medication I take I use Tumeric instead of NSAIDS so if you don't like Tumeric don't put it in. 

After a bit of this and a dash of that I came up with this Tomato Soup recipe, which is so good (spicy) it will knock the socks off of you. 

Tomato Soup...Susie Smeal Style

Serves 2

4 Roma tomatoes, deseeded and skinned 
3 Garlic Cloves
1 Tablespoon Olive Oil
1/4 Teaspoon Turmeric 
2 Tablespoon Lemon Juice
11/2 Cups Water
4 Fresh Sweet Basil Leaves Chopped
1 Tablespoon Fresh Chopped English Thyme
Pinch of Pepper
1/2 Teaspoon Tabasco Spicy Salt 

To skin tomatoes, bring a pot of water to a boil and drop tomatoes in for three minutes. Remove and drop into ice water. Make a slit in the skins. Skins should slip right off. To deseed cut in half and squeeze the seeds out.  

Put everything into the Vitamix and run on high for 6 minutes.  Soup should be very hot and ready to eat.  You can adjust the ingredients to your taste. 


Tender Discs of Wonderment...Donuts...Oh My...

I wrote this last year but somehow forgot to post.  Thank goodness I wrote this recipe down, as the website (Primal Palate) for this recipe has been taken down and is no longer available.

Since becoming gluten-free due to a medical condition, I have been yearning for some good old fashioned donuts.  In searching for the all elusive recipe for a yeast donut using gluten free products, I had given up all hope on find one however, not necessarily my favorite, I will eat cake donuts.  

After much research I finally settled on a recipe that took the fewest ingredients and put forth a heavenly disc of deliciousness. What was this that I had discovered that was so tender, so moist, made out of almond and arrowroot flours?  

I am new to grain free baking so I was expecting a 
complete flop that I would be feeding the dogs. One Friday while in Kansas City, Christie and I headed to Pryde's Kitchen Store just on the fringe of downtown Kansas City. I love this store. The building was built in 1922 as a ballet studio for Ballet Mistress Helen S Thomes. We picked up a donut pan and a cheesecake pan as well as I was going to attempt making a raw cheesecake, but that is another story. After heading to Sprout's to finish picking up the remaining ingredients necessary to make said donuts, I settled myself down on the couch to review the recipe once more, as my back was done for and there would be no baking this day.

Saturday morning Christie had left early to help coach and participate in the 2016 MURPH Challenge. For those of you in the Cross-fit world, you know what I am talking about. For those of you who are not knowledgeable of the Murph Challenge you can read about it here.

I got up had my coffee, medication, and put on my apron and got busy putting together my Grain-Free Donuts. I have to give credit where credit is due. I would not have gotten anywhere without The Primal Palate and working with their recipe. 

Equipment Needed:

Donut Pan
Wooden Mixing Spoon
Measuring Spoons
Dry Measuring Cups
Wet Measuring Cups
2 Mixing Bowls 1 Large 1 Smaller
Blender
Spoon
Can Opener
Chopstick


Heavenly Donuts
Grain-Free

2 Cage Free eggs
3/4 cup Coconut milk
1/2 cup Pure Maple Syrup
1 tsp Pure Mexican Vanilla extract

1 1/2 cup Almond flour
1/2 cup Arrowroot flour
3 tsp Baking powder
1/2 tsp Pink Himalayan Salt

3 tbsp Organic Coconut oil

2/3 cup Lemon glaze
1 cup Chocolate ganache (optional)

Pre-heat oven to 375 degrees Fahrenheit.

Mix the first three ingredients in a separate bowl and set aside.

Mix the next 4 ingredients together, stir well. Pour the ingredients of the first bowl into the dry ingredients mixing well. Melt coconut oil in microwave about 25 seconds, pour into mixture blending well. 

  1. Preheat the oven to 375 degrees.
  2. In a small mixing bowl, combine the first 4 ingredients. Using a hand mixer, blend ingredients until smooth.
  3. In a large mixing bowl, combine the next 4 ingredients. Stir with a wooden spoon until combined. 
  4. Pour the wet ingredients into the dry and blend all ingredients with your hand mixer until smooth
  5. Add your softened coconut oil to the batter and blend again until all ingredients are combined evenly.
  6. Liberally grease your donut pan with coconut oil and spoon about a cup of batter into a Ziploc bag.
  7. Snip one of the corners off of the Ziploc bag and pipe the batter into the donut mold. More batter makes a fluffy donut, but you will have less total donuts. Filling the molds 3/4 full will yield about 16 donuts. 
  8. Smooth the tops of the batter by carefully tapping the donut pan on the counter.
  9. Bake the donuts for 12 minutes, making sure to check them after 10 minutes. Remove donuts from oven and allow to cool on a wire rack. (Note: I cooled 2 batches out of the pan on the wire rack and one batch in the pan. The batch allowed to cool in the pan was by far more tender than those cooled on the wire rack.)
  10. Grease donut pan again and repeat for another batch of donuts.
  11. Once donuts are completely cool, dip them into your choice of frosting. It helps to have the frosting in a shallow bowl to dip in donut. A chopstick is a great tool to remove the donut from the bowl and place on the rack to let the frosting drip down the sides. Be sure to have some wax paper down underneath to catch the drips. Place the donuts in the fridge for a few minutes to help the frosting set before serving. 
  12. If using the lemon glaze, refrigerate donuts after dipping, then dip a second time  and refrigerate once more to allow the glaze to set.
  13. To get a real lemon pop use some food grade lemon essential oil in your lemon glaze.

Lemon Glaze

2/3 cup powdered sugar
3 tbsp lemon juice

Mix together well in a shallow bowl.  Enough for 16 donuts.  Make a double recipe to double dip. For a real lemony mixture, add 3 to 5 drops of food grade essential oil or until you get the taste you want. 

Vanilla Glaze

2/3 cup powdered sugar
3 tbsp milk
1/2 tsp vanilla

Mix until smooth in a shallow bowl. If it starts to crust over add a few drops of milk and stir. 


What is the old saying? "I bet you can't eat just one" These little discs of tenderness are melt in your mouth wonderment. They are so mouthwatering you want to eat more than one. So just beware if you make these be prepared to slap your hands when you go to reach for them, again and again and again!